This article has been updated to include features found in version 2.3.17. Please be sure you have at least that version.
There are a number of ways to change the email content that the plugin sends.
stripe_email_body– This allows you the most freedom to construct a fully custom email.stripe_email_footer– This allows you to insert a custom footer into the default email template.stripe_email_before_send– This allows you to modify the subject, change email headers (reply-to, from, cc…) and cancel emails.
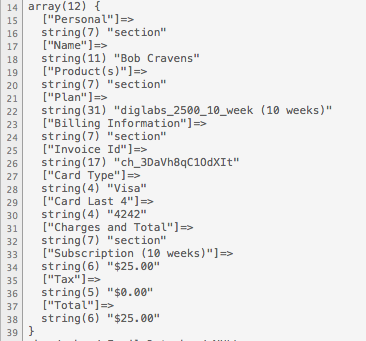
In the stripe_email_body and stripe_email_footer hooks the $data parameter contains the dynamic information used to build the email. Sometimes you just need to filter this data. Here is a screenshot of typical data:
As you can this data is a PHP array of key/values. You can modify this array by using a filter that is exposed by the plugin. Here are the steps:
Create Custom PHP File
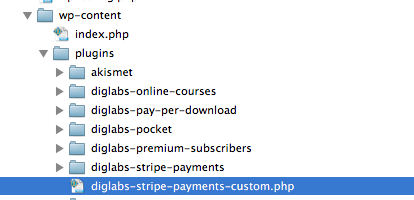
As of version 2.3.13, the plugin makes it easy to add custom PHP code. Simply create a ‘diglabs-stripe-payments-custom.php’ file in the WordPress plugins folder. The plugin will load this file if it exists. Here is a screenshot of the custom file in the directory tree:
Custom Code
The WordPress filter name is ‘stripe_payment_data_filter’. Here is an example of how to use this filter:
<?php

function email_data_filter($data, $meta)
{
	// $data - contains all the data currently in the email.
	// $meta - contains all the form data (access field like $meta->unit where unit is the field name).
	$result = array();

	// Loop over existing data and modify.
	//
	foreach( $data as $key => $value )
	{
		if($key == "Product(s)")
		{
			// Replace the key with a new one.
			//
			$result["Plan"] = $value;
		}
		else if( strpos( $key, "Subscription" ) !== false )
		{
			// Replace the word subscription with something new.
			//
			$new_key = str_replace( "Subscription", "XXX", $key );
			$result[ $new_key ] = $value;
		}
		else if( $key == "Tax" )
		{
			if( $value != "$0.00" )
			{
				// Tax is not zero...keep it in the invoice.
				//
				$result[ $key ] = $value;
			}
		}
		else
		{
			// Keep everything else un-modified.
			//
			$result[ $key ] = $value;
		}
	}

	// Add any form field data you want to the email.
	//
	$result['Unit'] = $meta->unit;

	// Add any new key / value pairs.
	//
	$result['test'] = 'This is a test';
	return $result;
}

add_filter('stripe_payment_data_filter', 'email_data_filter', 10, 2);
Results
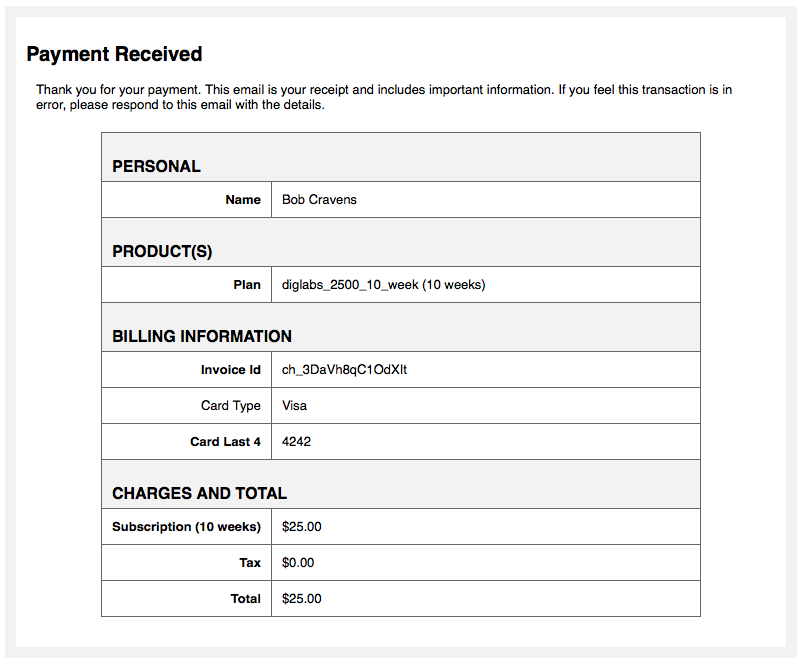
Before adding the above filter here is a screenshot of the email receipt:
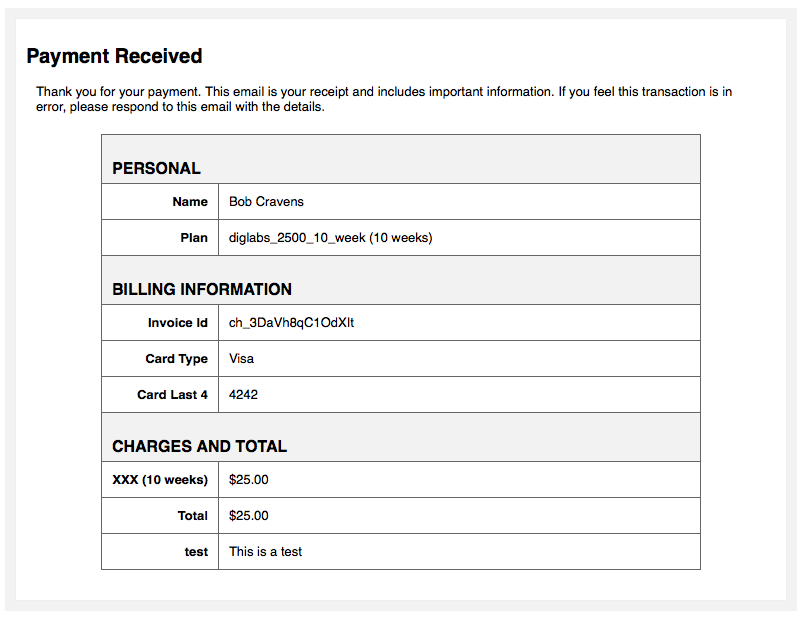
After adding the filter the email receipt looks like this:
Enjoy your new found powers!


 Secure Pay app
Easy billing options.
 Taskilio
Agile project managment software.
 Pass It Safe
Securely pass credentials.
 Stripe Plugins
Easy online payments.